Monday, June 14, 2010

Level Sanding The Finish

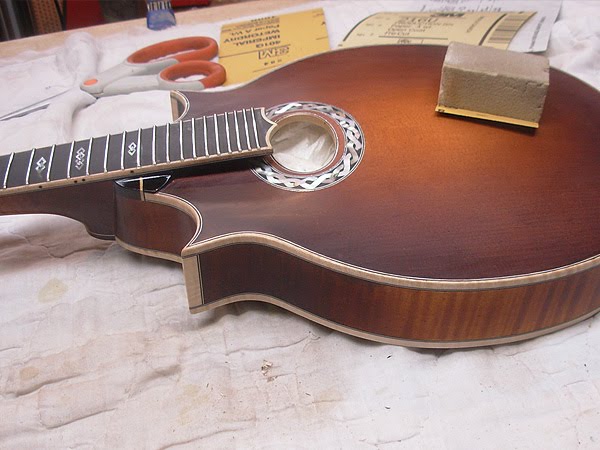
After the lacquer has dried for at least 24 hours, the entire mandolin is very lightly sanded with 320 grit free-cut sandpaper. Then it gets another 3 coats of lacquer, sanded with 800 grit and sprayed once more. Now I'm using 1500 grit and a foam pad to level the finish coats. This dulls down the gloss to an even matte. If there are any shiny spots, it means I'm not there yet.

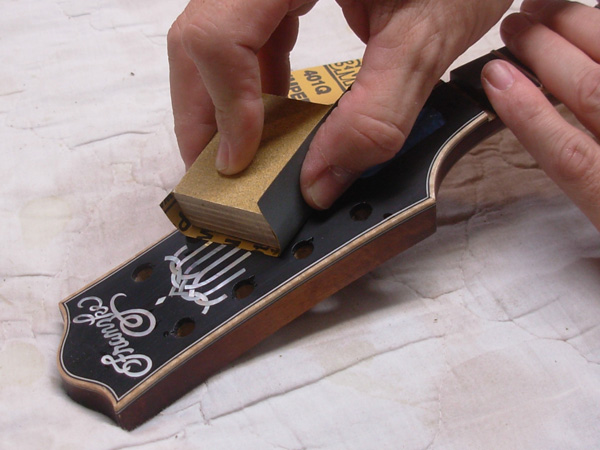
 On the headstock face, I use a wooden block with the sandpaper to make sure it stays perfectly flat.

Every square inch must be sanded. I like to watch or listen to a KC Royals game while I'm sanding. It takes a good nine innings to level sand a mandolin. Sometimes I need extra innings.

Inspector #12 uses his cat-like senses to discern even the slightest imperfections in the finish.

"You missed a spot."

Wednesday, June 2, 2010

The Finishing Process

After the stain is dry and the bindings are all scraped of any color bleed, clear lacquer is applied. When enough coats have been sprayed, it sits overnight to fully dry. Then it is lightly sanded and more clear coats are applied.
 
The stains are first applied by hand starting with the amber color in the center, and then browns are worked around the edges. I then use an airbrush to darken the area around the perimeter for a dramatic look.
 
I created my colors using concentrated liquid stains mixed with denatured alcohol. The stain really brings out the flamed figure in the maple.
All masked off ready to apply the stains.
Before applying the stain, I masked off all the bindings. There will be a little bleed through that will need to be scraped off, but this at least protects most of it and keeps the tedious scraping to a minimum.

Friday, March 26, 2010

Stringing It Up

I cut the fret wire to length and trimmed the ends where it overhangs the binding edge.

All the frets have been hammered into place and the ends filed to an even bevel.

Then I installed all the hardware, fit the bridge and put the strings on it. I will play it for a couple of weeks and see how it plays and if the neck feels right. I can still make some minor adjustments at this stage before I start applying the finish. I am very pleased with the way this one sounds and plays so far. I will probably sand the neck just a little bit thinner, but otherwise this one is ready to finish.

A close-up of the ebony heel cap to contrast with the maple binding.

I really like to play with contrasting woods for accent. This one uses a lot of ebony appointments for a kind of elegant almost formal black and white look. I don't know how I will stain it yet. This one would look really good left natural with a clear satin finish. On the other hand, if I fade some dark color around the edges the maple binding will really stand out, which is what I originally had in mind from the beginning.

A close-up of the ornate pearl/abalone/ebony inlaid sound-hole rosette.

Thursday, March 18, 2010

Attaching The Neck and Assembling the Body

The body is now fully assembled, ready for frets, bridge and hardware. Then I'll string it up and see if it makes music.

The maple binding was bent and mitered ate the corners of the fingerboard. The black and white stripes need to match exactly.

I trimmed the neck heel with ebony/ maple/ ebony to contrast with the body binding.

The "guts."

I use a tapered dovetail neck-to-body joint. The excess neck heel will be trimmed off flush with the body block.

Wednesday, March 10, 2010

Binding the Top

The edge of the body was routed with a dremel tool and a special attachment. Now it will be scraped clean with a square razor blade.
 

I made the rosette sound hole trim with the pearl and abalone pieces glued to a thin veneer and edged it with white, black, white plastic binding pieces. I cut the recess in the top with an x-acto and small chisels. The edge will be bound with white, black and maple strips.

After the bindings and rosette have been glued in place, the top and sides were sanded flush.

I used the same binding theme for the peghead. It took a few tries to get the maple to bend into the double s-curve without breaking.

Tuesday, March 2, 2010

Inlaying the Mother of Pearl

 
I created the designs using a computer graphics program and printed it out using a laser printer. Then I cut out all the individual paper pieces and glued them to the Mother of Pearl blanks using plain white glue. This gives me a nice clean line to cut to.
After cutting all the pieces from the pearl with a jeweler's saw, I glued them to some poster board to keep everything together.

I use another printout of the design glued to the headstock, to rout out the inlay cavity with a Dremel tool. Using plain white glue, the paper design comes off the wood surface easily with warm water.
 
The small pieces are brittle and break easily. When this happens, it's best to cut another piece rather than try to glue it together.
 
After gluing the inlays in place, the small voids can be filled with wood dust from the routing process mixed with glue. After sanding the entire surface flush, any filled areas are nearly invisible. I try to rout the inlay area as close as possible, and use as little filler as necessary to give it a clean, sharp look. This also helps later during the finish process, as the clear finish will want to sink into the voids.


Monday, February 22, 2010

Neck and Body


The neck has been cut to shape, and the top has been glued to the body. The neck has an adjustable truss rod as well as two carbon fiber bars. It makes for a very straight, stiff neck, but still allows for slight adjustment if it is ever necessary.

The point protectors are made of maple with three thin wood fiber pieces for accent. The binding around the edge of the top and back will match the points.

The X-braces have been carved down and tap-tuned to D#. The back plate has been tuned to A#.

The fretboard has been profiled to shape and the slots have been cut.

Now comes the decorative parts. Inlaying the peghead and fretboard, binding the body and inlaying the sound hole rosette.
Stay tuned.