Wednesday, November 18, 2015

World Series Champs 2015 Banjo

So barely two weeks ago the Kansas City Royals won the World Series and I got this cool T-Shirt.


Now barely two weeks later, I finished making this cool banjo. As much as I like the shirt, it ain't a banjo


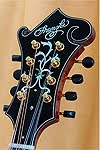
KC logo made from various dyed veneers inlaid in the headstock. The truss rod cover is home plate, of course.

The back of the neck is painted like a baseball bat.


I didn't want it to be "over the top" but then I did this on the banjo head and made a tailpiece cover look like a baseball mitt, so...ok...over the top.


Here it is ready to play


Monday, November 9, 2015

World Series Champs Banjo

So one week ago this happened, and if you live in Kansas City it's kind of a big thing.

So now a week later, we're still reveling in it and I like my commemorative T-shirt just fine, but I think a commemorative banjo is just a bit more special, so that's what I did.

I waited until the final game was over to start it because I didn't want to jinx it and every fan knows that one little thing by one fan can affect the outcome of the game. The game went 12 innings so needless to say it was quite late when I started. I couldn't sleep after a victory like that anyway, so might as well start on a banjo.

 I cut the logo out of different color wood veneers using a laser cutter. Ok, I just took the magic out of that part. I'll try to make up for it later.

 Using a jeweler's saw, I cut 21 letters out of a material called reconstituted stone. It's got a marble look to it, and I thought it would look cool in larger pieces like this.


I used a wood called Purple Heart for the fingerboard. It's the closest thing to blue. I used my Dremel tool with the router base to inlay the letters into the wood.

 I wanted to add some sparkle to the banjo so I found some old drum wrap material and laminated it to a piece of maple. I cut it in strips and sanded it to thickness and used it to trim the neck and resonator.

  Just a little bling. I don't want to overdo it.

I painted a baseball on the head. Ok, so I just overdid it.


 I used a blue dye to stain the neck, rim and resonator.

I masked the color at the top of the neck to resemble a baseball bat.


 Here we are a week after our world series victory. I'll put the clearcoats on it now and we got a World Series banjo!

Tuesday, December 30, 2014

1950 Gibson ES-140 Restoration

So I found this guitar at the Folk Store in Kansas City, and thought it was really cool. A 1950 Gibson ES-140, which is a 3/4 size archtop electric. It had a broken neck with a bad repair job, the finish was rough, tuners shot, pickguard damaged, but the electronics were still good.

"I"LL TAKE IT!"


I guess the repair worked even if it wasn't pretty. I'll have to make a new neck. This one is beyond repair.


I got the neck out and then decided I wanted to replace the plywood back and top with solid carved spruce and maple. So, off with the back!


I copied the peghead exactly... sort of.
The original had a screen printed logo, but I painted mine. Oh, and I added an inlay to make it look like it's full-sized brother, the ES-175.


I might as well inlay the fretboard to go with the 175 theme. I cut all the pearl by hand. 


I used the original fretboard, filled in the dots, inlayed the pearl and repaired the worn areas.


I used solid Engelmann spruce for the top and hand carved it to shape. 


Solid maple back.


I glued in the tone bars just like the original top.


Here are some details


I sanded the sides down to the bare wood and used cream colored binding to match the faded color of the original


Finished!! One of a kind, solid carved spruce top and solid carved flamed maple back, The sides are still original, as well as the fretboard, electronics, tailpiece and pickguard bracket.
I made a new pickguard and bridge, and replaced the tuners, and had the tailpiece bracket re-plated.


After spraying the lacquer, I noticed the painted logo was dissolving, so I repainted with different paints, and it still wasn't holding up, so I decided to cut the logo out of gold Mother-of-Pearl and inlay it. Now back to finishing.


I replaced the tuners with repro Kluson tuners that are nearly identical to the original ones.


Friday, September 5, 2014

Custom Inlay for an Upright Bass Tailpiece

 The owner always wanted an ebony tailpiece to match the fingerboard, and decided to have it custom inlayed while she was at it.

From THIS:

To THIS:

Here's how I did it: I created the design to fit the shape of the piece and to represent a tree with roots which were symbolic to the owner. I didn't want to make it a realistic tree, just to suggest it and create an overlapping, interwoven design. Once the design was complete I printed it out, cut out all the pieces and glued them to the Abalone shell and reconstituted stone pieces


I hand cut each piece using a jeweler's saw and glued them to a piece of black paper using thinned white glue to keep them in place.

I also cut the printed design out of a piece of white paper and glued it to the tailpiece to give me a very clear edge to rout to.


After routing out the channel with a Dremel, I used water to loosen the glue and remove the cut pieces from the black paper.

Then I fit each piece into place.

Since I am inlaying thin flat, rigid pieces into a curved form, I had to cut them at strategic places and bevel the edge, so that when I sanded the curve, the inlays would be down in the channel.

The final piece was my "F" script logo, also hand cut.

After filling, sanding and polishing, it looks like this:


As a final touch, she wanted a moon and stars on the bottom of the fingerboard, representing her and her four grandchildren.