Monday, November 29, 2010

Walnut Tenor Banjo

Close up showing the black/maple checkerboard purfling.

Walnut rim, neck and resonator
Inlaid Abalone and Mother-Of-Pearl
Walnut rim with maple bottom edge. Figured walnut neck with ebony and maple cap
Burled walnut resonator with concentric rings
Mother-Of-Pearl fingerboard inlays
The complete "pot" assembly

Tuesday, September 21, 2010

Tenor Banjo Project

The one on the left is a short scale open back tenor. The one on the right is a modern scale resonator tenor. Both are set up for playing Irish music.
 
The headstock finished featuring an original inlay design of mother-of-pearl and abalone.

 
The flange pieces were custom made for me from my original design. They are laser cut from stainless steel and nickel plated.

 
The maple neck and resonator were stained in a sunburst of amber and browns and then sprayed with clear lacquer.

 
The open back was made from maple and walnut and left natural with a clear finish.

 
The "pot" assembly. The wood rim is made of walnut with a maple bottom cap. The tenor banjos have an archtop tone ring mounted on the wood rim.


Finished parts ready to be assembled.
 
Making the necks of maple and walnut. The foreground necks are four-string tenors and the background neck will be a five-string.

Sunday, September 5, 2010

Counting Down

It's up to $1325 with 11 hours to go!

Wednesday, September 1, 2010

See And Hear


Here is a video of me playing "Blue Eagle" and "Cattle In The Cane."
(And, yes that is an old-school Hi-8 Video camera. I couldn't get rid of the display in the corner of the screen.)

Sunday, August 29, 2010

Start the Bidding!

The mandolin is now being auctioned at the address below. All the money from the sale will go toward scholarships for music students to attend an Irish music camp, school or other musical program. To watch the auction, or better yet, to bid, go here:
http://cgi.ebay.com/ws/eBayISAPI.dll?ViewItem&item=120615232087&ssPageName=STRK:MESELX:IT

Tuesday, July 6, 2010

Finished!

Front and back.

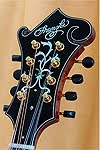
 The headstock with the "fountain" inlay.

Side view.

Close-up.

The interwoven pearl/abalone inlaid rosette.

Attaching the tuners.

A piece of adhesive-backed 120-grit sandpaper is stuck onto the top and the bridge is moved back and forth to make the bridge bottom conform perfectly to the arched shape of the mandolin top. The bridge is attached to a jig to hold it perpendicular while sanding.

Thursday, July 1, 2010

Buffing The Finish

Ooohh...shiny!

A close-up of the peghead.
That's a high-gloss finish!
The third and final buffing.
Changing pads for level 3 buffing compound. You must always use a dedicated pad for the different compounds or you will end up with scratches in the finish.
Charging the second buffing pad with level 2 compound.
After the first buffing, it looks quite a bit glossier. It will get glossier yet with two more buffs.
I use a power buffer spinning at 850 rpm with a coarse compound to buff out the fine scratches from the hand sanding. I keep the instrument moving with only slight pressure against the wheel to keep it from getting too hot and melting the lacquer.
After sanding the entire mandolin with 1000 grit, and 1500 grit papers, I used 1800, 2400, and 3200 grit Micro Mesh pads. Now the lacquer is perfectly smooth and flat and has a satin finish.

Monday, June 14, 2010

Level Sanding The Finish

After the lacquer has dried for at least 24 hours, the entire mandolin is very lightly sanded with 320 grit free-cut sandpaper. Then it gets another 3 coats of lacquer, sanded with 800 grit and sprayed once more. Now I'm using 1500 grit and a foam pad to level the finish coats. This dulls down the gloss to an even matte. If there are any shiny spots, it means I'm not there yet.

 On the headstock face, I use a wooden block with the sandpaper to make sure it stays perfectly flat.

Every square inch must be sanded. I like to watch or listen to a KC Royals game while I'm sanding. It takes a good nine innings to level sand a mandolin. Sometimes I need extra innings.

Inspector #12 uses his cat-like senses to discern even the slightest imperfections in the finish.

"You missed a spot."

Wednesday, June 2, 2010

The Finishing Process

After the stain is dry and the bindings are all scraped of any color bleed, clear lacquer is applied. When enough coats have been sprayed, it sits overnight to fully dry. Then it is lightly sanded and more clear coats are applied.
 
The stains are first applied by hand starting with the amber color in the center, and then browns are worked around the edges. I then use an airbrush to darken the area around the perimeter for a dramatic look.
 
I created my colors using concentrated liquid stains mixed with denatured alcohol. The stain really brings out the flamed figure in the maple.
All masked off ready to apply the stains.
Before applying the stain, I masked off all the bindings. There will be a little bleed through that will need to be scraped off, but this at least protects most of it and keeps the tedious scraping to a minimum.

Friday, March 26, 2010

Stringing It Up

I cut the fret wire to length and trimmed the ends where it overhangs the binding edge.

All the frets have been hammered into place and the ends filed to an even bevel.

Then I installed all the hardware, fit the bridge and put the strings on it. I will play it for a couple of weeks and see how it plays and if the neck feels right. I can still make some minor adjustments at this stage before I start applying the finish. I am very pleased with the way this one sounds and plays so far. I will probably sand the neck just a little bit thinner, but otherwise this one is ready to finish.

A close-up of the ebony heel cap to contrast with the maple binding.

I really like to play with contrasting woods for accent. This one uses a lot of ebony appointments for a kind of elegant almost formal black and white look. I don't know how I will stain it yet. This one would look really good left natural with a clear satin finish. On the other hand, if I fade some dark color around the edges the maple binding will really stand out, which is what I originally had in mind from the beginning.

A close-up of the ornate pearl/abalone/ebony inlaid sound-hole rosette.