Saturday, December 8, 2012

 A nice piece of solid Honduras Mahogany just like the original.

 Unlike the original, I cut 2 grooves into the neck block on the table saw and inserted carbon fiber bars to add stiffness to the neck. The original just had the rosewood center strip, but I like the stiffness the carbon fiber adds because it helps increase the sustain of the strings when they are strummed.

 Cutting the scroll on the headstock is a difficult thing. It can get away from you quite easily. Orville Gibson designed this over 100 years ago, and it's still being imitated. He designed it so the vertical cuts are perpendicular to the fretboard surface, not the headstock. To make the cut, the neck is held in a jig while it is cut on a bandsaw with a 1/8" blade.

.
The neck is held in the same jig as it is smoothed out on a spindle sander.
 
After cutting the Mother-of-Pearl logo, the headstock is routed out using a Dremel rotary tool and very fine bits.

Sunday, December 2, 2012

1906 Gibson F-2 Mandolin Restoration Process

I cut the logo by hand out of Mother-of-Pearl using a jeweler's saw and a very fine blade.


 The logos from that era can vary some from one instrument to the next, so having the original to go by allowed me to copy the size, shape and placement of the original.

Fitting the neck dovetail to the body is a time-consuming process. The curve of the body is not symmetric because of the scroll, and the neck must match the body. It also must be centered from side to side and set at the correct angle top to bottom for the strings to be the right height in the end.
 
I had to replace the white plastic crosspiece and the small trim piece since they were damaged. The cross piece is supposed to line up with the 12th fret when the fretboard is glued on.

  
 I glued very thin spruce wedges into the cracks in the top. It had some old wood filler in it that had flaked out. This will be a much stronger repair and help maintain the integrity of the solid carved top.

The position markers were originally made from the same tortoise-colored plastic as the pickguard. Only three of them were intact. The material is not available anymore, so I used a very small hole punch to make little dots out of a guitar pick.
 
 The fretboard is all bound and fretted and ready to glue to the body. I really love the shape of the fretboard end, and the mitered-corner bindings.

Sunday, November 4, 2012

Restoring a 1906 Gibson F-2 Mandolin

 This 1906 Gibson, serial #6221 was found at an estate auction. It looks pretty rough. The neck has been broken and poorly repaired, but the body is in pretty good condition for its age.

 The back is very solid with one small damaged area at the bottom that can be repaired.

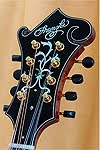
 The peghead was broken completely off and also cracked down the middle, and both scrolls were broken off. Someone "fixed" it by running a bolt all the way through horizontally and painting it black. The beautiful original German made Handel tuners are still completely intact and functioning.

 The engraved tailpiece is completely intact and in pretty good shape. Since all the original hardware is still good, this is a perfect candidate for restoration.

 The top has a couple of minor cracks that can easily be repaired, but I'll have to do some cosmetic work to undo the bad repair job from some time before.

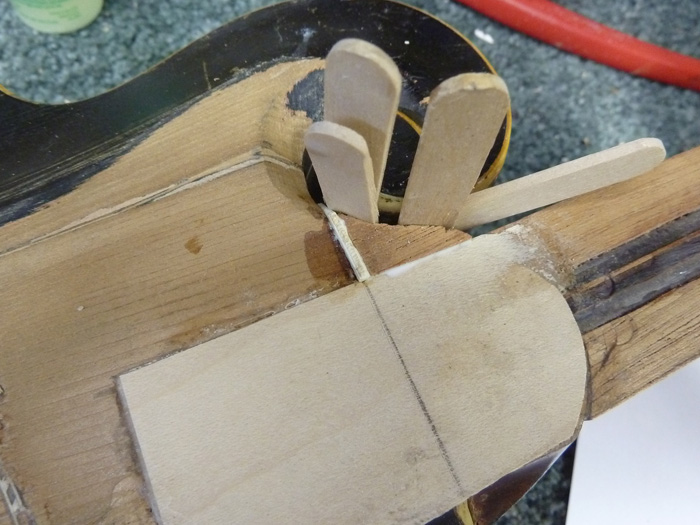
 Let's start the demolition! I carefully removed the back with a little steam and a thin hot blade.

 The design and workmanship are excellent from 1906. The inlaid piece of ebony in the top supports the end of the fretboard. I'll have more details of this later. I love the level of detail for purely aesthetic purposes.

 OK, so I wasn't so careful removing the neck. I have to build a new one anyway. This one is beyond repair, so I sawed it off. Sorry Mr. Gibson, sometimes surgery isn't pretty, but necessary.

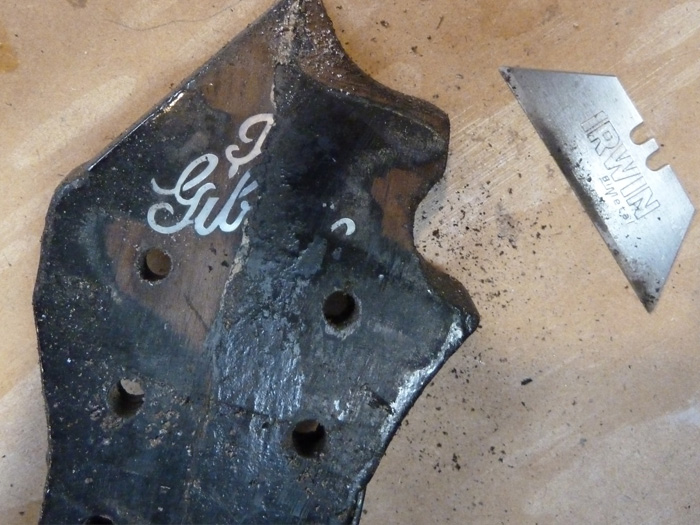
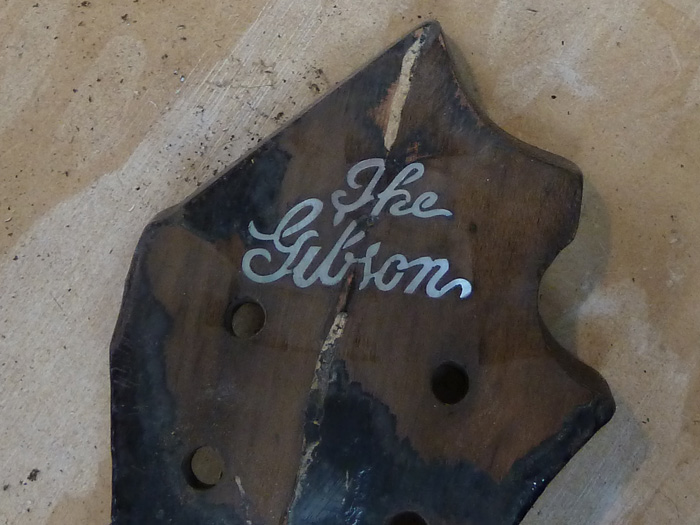
I took a blade and scraped off the paint to see if the original logo was there. I couldn't see any sign of it through the paint and thought maybe it had been removed.

 It was like scratching off the winning lottery ticket.

Since the peghead had been broken in half, the Mother-of-Pearl inlay was also broken, but at least I have an accurate pattern and exact placement when I replicate it. These were cut by hand and I have seen several instruments from this era and the logos have some wild variation. I was really happy to find this, so I can make the new one exactly the way Orville Gibson intended it.


Sunday, September 9, 2012

1907 Orpheum #3 Banjo Finished

It's all finished and assembled. One of the most interesting restorations I've ever gotten to work on. I love the intricate design and all the details from the ornate inlays to the multiple piece dowel stick.

The peghead inlays were mostly intact. I only had to cut a couple of small pieces to replace the missing ones.

The fretboard inlays were all hand cut and inlaid into a new fretboard.

The inlay on the back of the headstock was intact. The tuners are all new modern replacements.

I had to hand shape the heel of the neck to fit the curvature of the body and to create the proper neck angle. The carving was all original, and the neck was in very good shape, so I didn't have to re-create the inticate carving on the heel.

A view of the maple/ebony dowel stick I created to closely match a photograph I had of another Orpheum from the same era.

Most of the hardware is new reproduction hardware, but I found an old armrest and a vintage neck/rim bracket that were closer to the originals than the modern repros.


Wednesday, July 4, 2012

Stretching The Head

The brackets, hooks and tone ring have all been attached to the finished rim.

The calfskin head has been soaked in water and is now damp and pliable. The hoop is placed in the center.

 The head is draped over the banjo rim assembly, and a magic wand is waved over it.
 VOILA! A real live banjo!


OK... here are the "behind the scenes" steps:
 The head is folded toward the center and the tension hoop is placed over the outer edge.

 The hide is pulled up between the tone ring and the tension hoop, carefully removing all wrinkles.

 As the head is stretched, I make sure it is pulled down evenly all the way around.

The excess is trimmed away after the head is almost dry, but still slightly soft. The head will shrink some as it dries, so I don't want it too tight to start. I'll tighten it over the next couple days and then it's ready to string up!

Sunday, June 24, 2012

Finishing The Orpheum

 Preparing the shellac for French polishing. Basically just alcohol and shellac flakes. TIP: Never mix your alcohols.

 I start with some thinned shellac with a little amber stain mixed in to give it some base color.

 Next I French polish using a little heavier shellac mix. I'm using medium amber shellac flakes so as I build the finish, the color starts getting a little deeper. French polishing uses a cotton ball dipped in the shellac mix, wrapped in a cotton cloth, and dabbed with a drop of olive oil so it will wipe on smooth. I slowly build up the finish with this technique.

 Once I have it built up to where I want it, I use a 400 grit sandpaper to level it all and remove the streaks from the wiping process.

Now I use a much thinner shellac mix for the top coats. There's no streaking with the thinner shellac, so there may just be some minimal light sanding followed by some polishing cloths, and it will be done. Once it's cured, it's as durable as modern lacquer finishes as long as you don't leave it in the sun or a hot car, or spill your whiskey on it. It's a difficult technique to master on larger instruments like guitars, but a banjo neck is not too bad

Sunday, June 17, 2012

Orpheum Update

 
 What is it?


 If you guessed a banjo neck-to-body alignment jig, you would have been correct. The square fence at a 45 degree angle keeps a circle perfectly centered.

 The jig holds the neck, dowel, and rim assembly in place while I square everything up.

 I check the fit of the neck heel against the body at the correct angle.

The proper angle of the neck ensures the string height at the bridge will be correct. Once everything is right
the dowel is glued into the neck.

Ready for final sanding and varnish.

 The neck is fretted, inlaid bound and ready for varnish.

Close-up of the intricate inlay.